The key to unlocking 25% more floor space isn’t acquiring more land; it’s monetising the cubic air you already pay for by implementing smart vertical systems.
- Installing a mezzanine floor can double your capacity but requires precise structural planning to pass safety inspections.
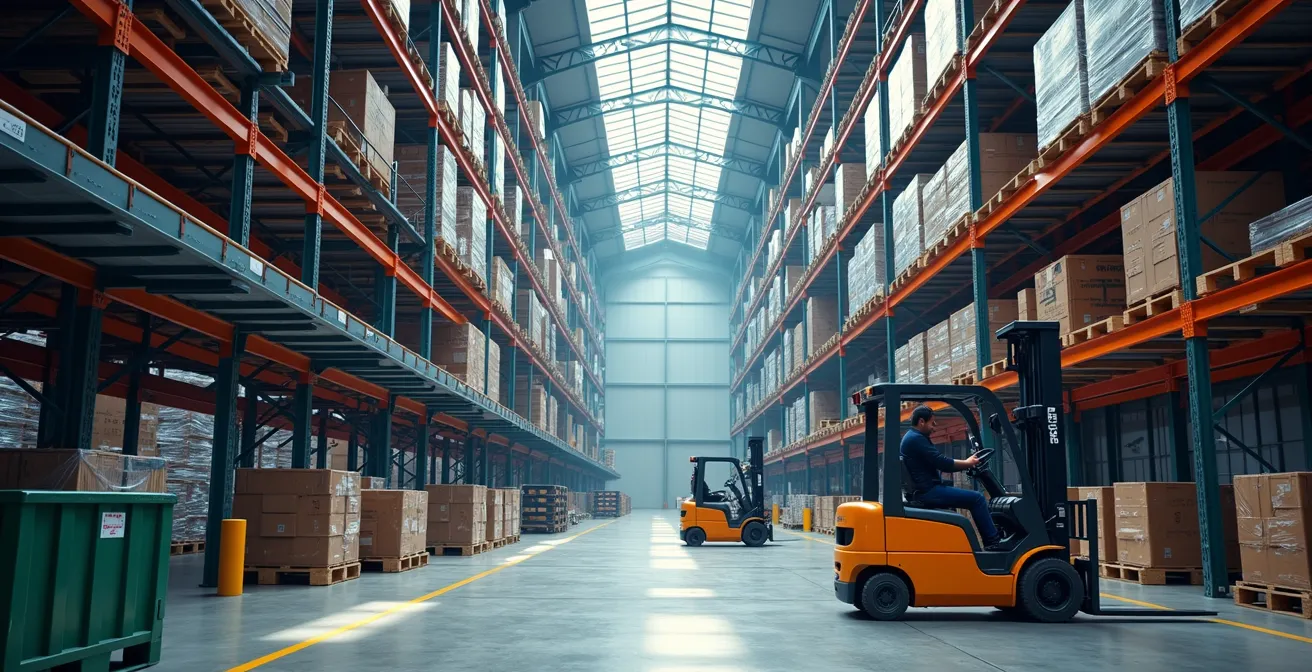
- Mobile racking offers up to 80% greater density than static shelving for slow-moving stock, directly converting aisle space into storage.
Recommendation: Begin by auditing your warehouse’s vertical space not as a void, but as an untapped financial asset ready for conversion.
Every square foot of your warehouse, especially in high-rent areas like London and the South East, comes with a punishing price tag. The pressure to store more inventory within the same footprint is relentless. You’ve heard the standard advice: “go vertical,” “buy taller shelves,” or “add a mezzanine.” While well-intentioned, this advice often misses the fundamental shift in thinking required for true spatial efficiency. It treats the symptom—lack of floor space—without addressing the root cause: thinking in two dimensions.
The real metric of warehouse efficiency isn’t square footage; it’s cubic volume. The empty air above your current operations isn’t a void; it’s an un-monetised asset. The most effective warehouse managers don’t just see floor plans; they see volumetric potential. This requires moving beyond simply adding height and instead engineering a three-dimensional operational space where every cubic metre contributes to the bottom line. It’s a strategic pivot from managing a cost (rent) to activating an asset (verticality).
This approach involves a deeper understanding of the trade-offs. A poorly planned mezzanine can create more problems than it solves, failing safety inspections and disrupting workflow. The wrong type of racking can slow down picking for your fastest-moving items. True optimisation is a science of flow, structure, and finance. This guide provides the operational and financial framework to convert that cubic air into profitable floor space, giving you the tools to analyse, plan, and execute a vertical expansion that directly impacts your margin by avoiding the costly pitfalls of generic advice.
To navigate this transformation, this article breaks down the essential components of a successful vertical strategy. We will explore the financial justification, the practicalities of installation, the right technology choices, and the critical safety considerations that turn vertical space into a competitive advantage.
Summary: A Strategic Guide to Vertical Warehouse Optimisation
- Why Renting External Storage Costs 3x More Than Optimising Your Current Height?
- How to Install a Mezzanine Floor Without Disrupting Daily Dispatch Operations?
- Static Shelving vs Mobile Racking: Which Yields the Best Density for Slow-Moving Stock?
- The Structural Mistake That Causes Mezzanine Floors to Fail Safety Inspections
- When to Schedule Racking Installation: Weekends vs Bank Holidays
- Why Moving Parts More Than 50m Between Stations Is Killing Your Margin?
- Why Your Loading Bays Are Idle 40% of the Day Despite the Queues?
- Logistic Flow Management: How to Eliminate Despatch Bottlenecks in UK Warehouses?
Why Renting External Storage Costs 3x More Than Optimising Your Current Height?
Renting external storage feels like a quick fix for overflowing capacity, but it’s a financial drain that masks deeper inefficiencies. The direct rental cost is just the tip of the iceberg. You also incur significant hidden costs, including transportation between sites, fragmented inventory management, increased labour for split teams, and process delays that damage service levels. When these ancillary expenses are factored in, the total cost of off-site storage can easily be three times that of the initial lease agreement. It’s a recurring operational expense that yields zero long-term asset value.
The alternative is to treat your existing vertical space as a capital investment opportunity. By re-evaluating your warehouse’s cubic capacity, you can unlock dormant space you already pay for. While a vertical fit-out requires an upfront investment, it generates a lasting asset that increases the value and productivity of your facility. According to efficiency guidelines, while warehouses typically allocate 22-27% of floor space for storage, this figure doesn’t account for the massive potential overhead. The true ROI comes from converting this unused vertical air into functional, revenue-generating floor space.
Calculating the “Volumetric ROI” is the first step. This involves a clear-eyed comparison of the one-time cost of vertical installation against the compounding, multi-year costs of external rental. By quantifying the hidden expenses of split inventory and transport, the financial argument for optimising your existing cube becomes overwhelmingly clear. It’s a strategic shift from renting a solution to owning an asset.
Your Action Plan: Calculate the ROI of Vertical Storage vs. External Rental
- Calculate current cost per square foot including rent, utilities, and insurance.
- Measure your unused vertical space (ceiling height minus current top-shelf height) to find your “cubic asset.”
- Determine the potential cubic footage gain achievable through a mezzanine or high-bay racking system.
- Compare the total vertical fitting installation costs against projected 3-year external rental fees.
- Factor in hidden costs: inter-site transport, split inventory management overhead, and process delays from a disconnected operation.
This calculation transforms an abstract concept into a concrete business case, proving that the most valuable space is the space you already own.
How to Install a Mezzanine Floor Without Disrupting Daily Dispatch Operations?
The biggest deterrent to installing a mezzanine floor is the fear of operational shutdown. The prospect of halting dispatch, disrupting inventory flow, and sending productivity plummeting is enough to make any manager pause. However, the key to a seamless installation lies in two principles: modular construction and phased implementation. Modern mezzanine systems are not built like traditional construction; they are engineered for assembly with minimal on-site fabrication.
By using pre-fabricated components and a rack-supported design, installation can occur alongside existing operations. The strategy involves building the mezzanine in sections, often during off-peak hours or in designated zones. This approach maintains operational continuity, allowing your team to continue picking and packing while the new level is assembled overhead. Temporary barriers, like industrial dust curtains, can create a safe and clean separation between the construction zone and active work areas.
Case Study: The Phased Mezzanine Installation Strategy
Leading suppliers like Quality Material Handling have perfected this method. They report that rack-supported mezzanines can be installed directly alongside and above existing pallet racking. By leveraging modular, pre-fabricated components, facilities can maintain near-full operational capacity while systematically adding vertical storage. This method not only avoids costly downtime but also makes the project more financially accessible, with installation costs ranging from $35-$70 per square foot—a fraction of the cost of traditional warehouse expansion.
This image illustrates how a phased installation allows work to continue on the ground floor while new structures are erected above.
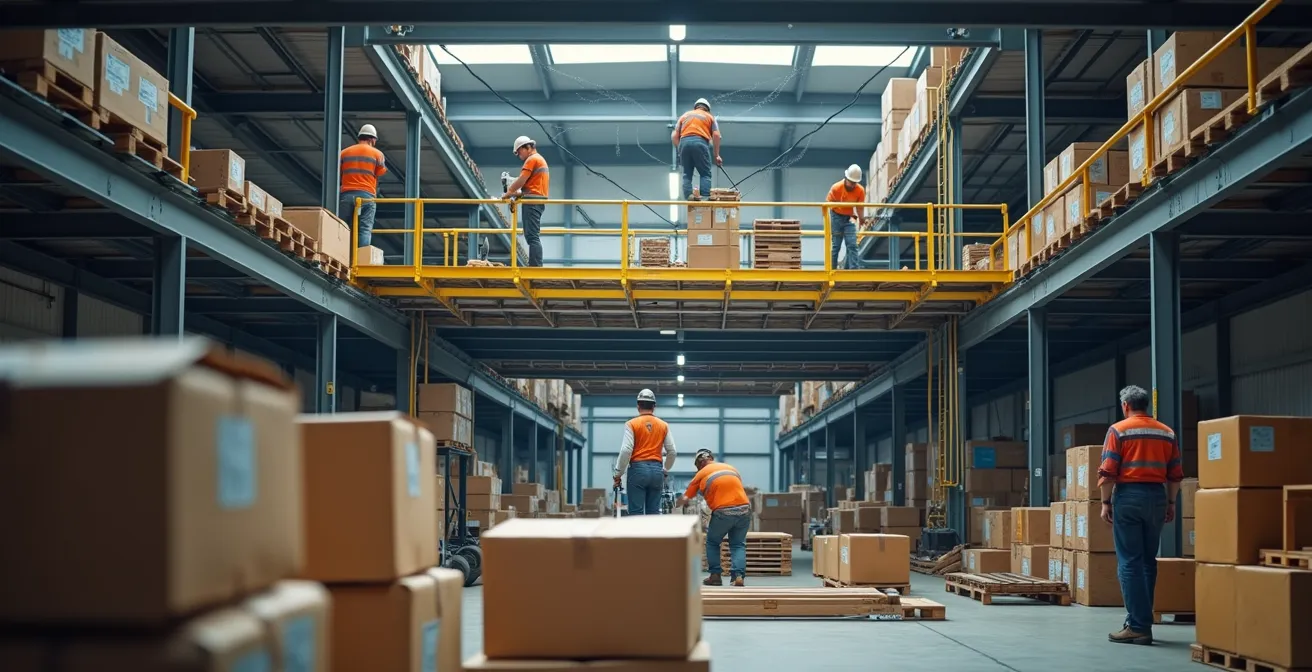
As you can see, the process is designed for minimal intrusion. The goal is not just to add space, but to do so with surgical precision that respects the ongoing rhythm of your business. The right partner and plan make it possible to double your footprint without losing a single day of dispatch.
Ultimately, a successful mezzanine installation is less about construction and more about choreography, ensuring your business never misses a beat.
Static Shelving vs Mobile Racking: Which Yields the Best Density for Slow-Moving Stock?
For slow-moving or deep-stored inventory, the choice of racking system has a profound impact on spatial efficiency. Traditional static shelving is the default choice, offering immediate access to every pallet location. However, this accessibility comes at a high spatial cost: fixed aisles. These aisles, which are necessary for forklift access, can consume up to 50% of your available floor space, effectively turning valuable real estate into empty corridors.
For slow-moving stock where pick frequency is low, mobile racking offers a far superior solution for storage density. This system places shelving units on motorised, railed bases. With the push of a button, an aisle is created exactly where it’s needed, allowing the rest of the racking to be compressed into a solid block. This eliminates the need for multiple, permanent aisles and can dramatically increase storage capacity. In fact, some vertical carousel manufacturers report up to 80% floor space savings by converting static aisles into usable storage.
The trade-off is access speed; creating an aisle can take 30-60 seconds. This makes mobile racking unsuitable for high-velocity SKUs but perfect for bulk storage, archival items, or seasonal products. The initial investment is higher than for static systems, but the ROI from reclaiming vast amounts of floor space often provides a compelling business case, especially in high-rent locations. The decision comes down to a clear analysis of SKU velocity versus storage cost.
This comparative analysis, based on data from industry experts, breaks down the key decision-making criteria for choosing between static and mobile systems.
| Criteria | Static Shelving | Mobile Racking | Best For |
|---|---|---|---|
| Space Utilization | 50-60% floor usage | 80-90% floor usage | Mobile wins for density |
| Access Speed | Immediate access | 30-60 second wait | Static for fast-movers |
| Initial Investment | $100-200 per position | $300-500 per position | Static for budget-conscious |
| Energy Usage | None | Electric motors required | Static for sustainability |
| Ideal SKU Velocity | Medium to high | Very slow moving | Depends on turnover rate |
By matching the racking technology to your inventory’s velocity, you can transform dead aisle space into productive, high-density storage.
The Structural Mistake That Causes Mezzanine Floors to Fail Safety Inspections
The single most common and dangerous mistake in mezzanine floor installation is underestimating the load requirements of the concrete slab it stands on. A mezzanine is not a piece of furniture; it’s a structural addition to your building. Simply assuming the existing floor can handle the new weight is a recipe for catastrophic failure and an immediate red flag for safety inspectors. A failed inspection not only results in costly rework but also poses a severe risk to your staff.
The critical error is failing to differentiate between a Uniformly Distributed Load (UDL) and a Point Load. The UDL is the total weight spread across the entire mezzanine surface, while the point load is the concentrated force exerted by each support column onto the concrete slab below. Many warehouse floors are rated for a high UDL but are not thick or strong enough to withstand the immense pressure of these point loads. This can lead to cracking, subsidence, or even punching through the concrete. An analysis from industry installers shows that most jurisdictions require mezzanines to meet strict OSHA compliance and local building codes, which always include structural load calculations.
This close-up view highlights the critical connection point where the mezzanine support column meets the concrete floor, the very spot where failures occur.
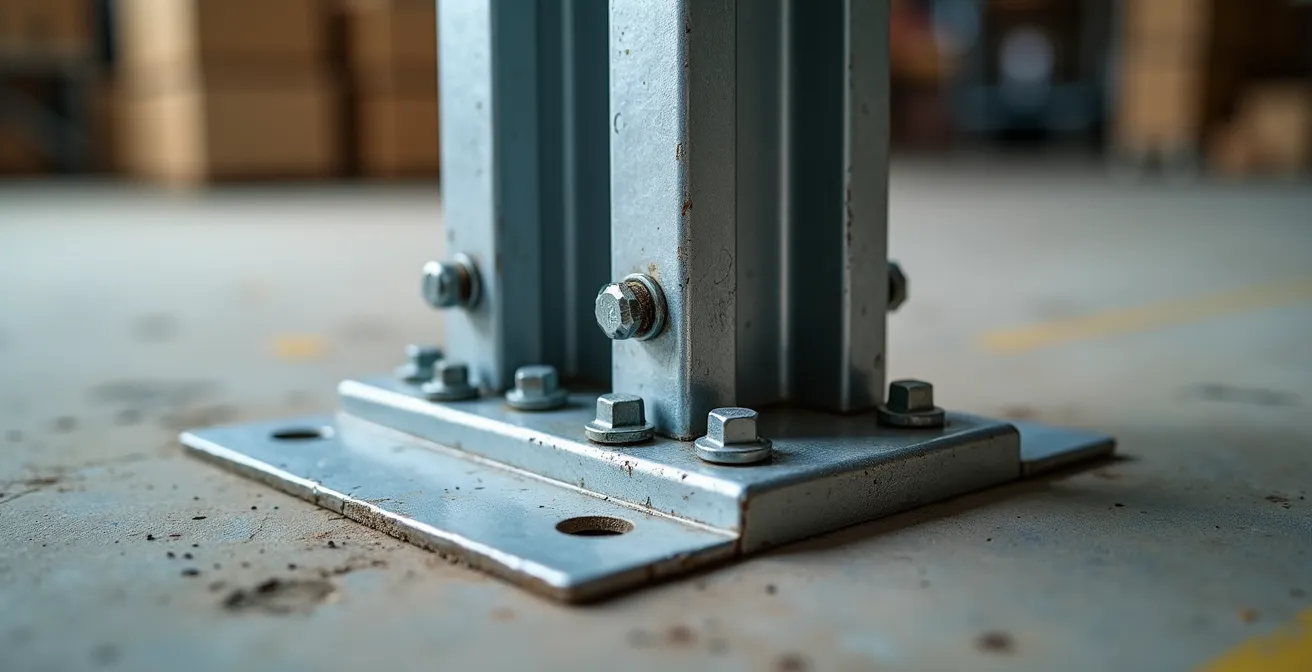
As the image shows, the integrity of this connection is paramount. To avoid this critical mistake, a professional structural assessment is non-negotiable. This involves:
- Core Testing: Drilling a core sample of your concrete slab to verify its thickness, composition, and compressive strength.
- Point Load Calculation: Ensuring the base plates of the support columns are large enough to distribute the load to a pressure the slab can handle.
- Dynamic Load Factoring: Adding a safety factor (typically 1.5x) to account for the additional forces from moving loads like pallet jacks or forklifts on the mezzanine.
- Proper Permitting: Submitting documented structural engineering calculations to obtain the necessary building permits before work begins.
Ignoring the science of structural engineering isn’t just cutting a corner; it’s dismantling the foundation of a safe workplace.
When to Schedule Racking Installation: Weekends vs Bank Holidays
Scheduling a major racking or mezzanine installation seems like a straightforward choice between disrupting a weekday or paying premium rates for a weekend or bank holiday. However, the most cost-effective solution is often counter-intuitive. While weekends and holidays offer a clear operational window, they typically come with labour costs that are 1.5x to 2x the normal rate. This can add tens of thousands of pounds to a large-scale project.
The optimal strategy is not about choosing a day of the week, but about identifying your business’s true “low-activity” period. This requires a data-driven analysis of your annual order volume and operational patterns. Most businesses have a predictable quiet period—often post-Christmas or during late summer—where workflow is naturally slower. Scheduling the installation during these windows, even on weekdays, can be far more economical.
Case Study: Optimal Installation Timing Analysis
REB Storage Systems, a company with over 60 years of experience, analyzed this very problem. Their data shows that the most cost-effective installation timing avoids both premium holiday rates and peak operational periods. Their analysis reveals that planned weekday installations during a business’s identified quiet season often cost 30-40% less than weekend work. This saving comes from avoiding overtime pay and leveraging a period of naturally reduced operational disruption, which minimizes the financial impact of any slowdown.
A strategic scheduling framework goes beyond just looking at a calendar. It involves a holistic view of your entire operation. Key considerations should include coordinating with suppliers to ensure materials arrive on time (avoiding peak carrier periods), planning the installation to finish at least two weeks before your next peak season to allow for staff training, and coordinating with neighbouring businesses if you share facilities like loading docks. Building in a 20% time buffer for unexpected delays is also a prudent measure that prevents a tight schedule from becoming a costly one.
By aligning the project with your business’s natural rhythm, you can achieve a seamless installation that is both operationally smooth and financially sound.
Why Moving Parts More Than 50m Between Stations Is Killing Your Margin?
In a warehouse, distance is time, and time is money. Every metre an employee walks to pick, pack, or move an item is a direct cost to your business that adds zero value to the product. When pick paths are inefficient and key stations are spread far apart, these metres add up to kilometres every day, silently eroding your profit margin. A journey of more than 50 metres between frequently used stations or for high-velocity SKUs is a major red flag, indicating a layout that is fighting against your operational efficiency.
This “travel waste” is one of the most significant hidden costs in warehouse operations. It manifests as lower pick rates, increased labour costs, and slower order fulfilment times. The solution is to minimise this travel by bringing the parts to the picker, not the other way around. This is where vertical storage systems truly shine. By concentrating inventory in a dense, vertical cube close to the packing or dispatch area, you can dramatically shorten pick paths. In fact, advanced automated vertical storage systems can achieve up to a 90% reduction in walking time, a staggering efficiency gain.
Case Study: Golden Zone Implementation for Pick Path Optimization
A well-established strategy is the “golden zone” principle, which applies the 80/20 rule to warehouse layout. Industry analysis shows that positioning the 20% of SKUs that account for 80% of your picks within a ‘golden zone’—an area immediately adjacent to packing stations—can have a massive impact. One UK warehouse implemented this by moving their fastest sellers to a dense storage area near dispatch. They calculated that reducing their average pick distance from 50 metres to just 15 metres saved them 2.3 labour hours per picker, per shift. This single change translated into tens of thousands of pounds in annual labour savings and faster order turnaround.
Conducting a simple “spaghetti diagram” audit, where you trace the physical paths of your pickers over a shift, can be a powerful way to visualise this wasted movement. The goal should be to straighten those lines and shorten them by rethinking your layout from a three-dimensional, flow-centric perspective.
Reducing travel isn’t just an efficiency tweak; it’s a direct investment in your bottom line.
Why Your Loading Bays Are Idle 40% of the Day Despite the Queues?
It’s a frustratingly common paradox in many warehouses: a long queue of trucks waiting outside while your loading bays sit visibly empty and idle for significant periods. This bottleneck, where bays can be inactive for up to 40% of the day, is rarely due to a lack of staff. Instead, it stems from a disconnect between inbound/outbound scheduling and the real-time capacity of your internal warehouse operations. The flow is broken.
The primary culprit is often a rigid, push-based system. Trucks arrive based on a fixed schedule, but if the internal team is still struggling to pick the order or clear inbound goods, the bay remains unusable. The queue grows, detention fees mount, and your operational heartbeat flatlines. To fix this, you need to shift to a dynamic, pull-based approach where the loading bay signals its readiness to the yard, not the other way around.
Optimising loading bay efficiency requires a combination of technology and process refinement. The goal is to achieve a target of at least 80% bay utilisation during operating hours. Key strategies to achieve this include:
- Dynamic Appointment Scheduling: Implement a system where carriers book slots that are linked to real-time warehouse capacity and order readiness.
- Flexible Staging Areas: Create buffer zones near the docks that can quickly switch between handling inbound and outbound goods, allowing for rapid turnover.
- Cross-Trained, On-Demand Staffing: Move away from fixed dock teams and cross-train warehouse staff to be deployed to the bays as surges in demand occur.
- Dock Management Systems: Install systems with clear displays for drivers, communicating which bay to go to and when, reducing confusion and wait times.
- Predictive Analytics: Use historical data to anticipate arrival patterns and pre-stage shipments before the truck even arrives.
By creating a responsive and intelligent link between your yard and your warehouse floor, you can turn idle bays into high-throughput hubs and eliminate the costly queues waiting at your gate.
The solution is to make your loading bays the final, responsive step in a well-orchestrated internal process.
Key Takeaways
- Renting external storage is a recurring cost; investing in your warehouse’s vertical space is a one-time investment that builds a long-term asset.
- Phased, modular mezzanine installation allows you to double your floor space with minimal to no disruption to daily operations.
- The structural integrity of your concrete slab is the most critical factor for a safe mezzanine; professional core testing is non-negotiable.
Logistic Flow Management: How to Eliminate Despatch Bottlenecks in UK Warehouses?
Eliminating dispatch bottlenecks requires a holistic view of your warehouse as a single, interconnected system. The problem rarely lies at the dispatch door itself but is a symptom of friction further upstream in your process—in picking, packing, or staging. Effective logistic flow management is about creating a smooth, continuous current of goods from the shelf to the truck, and this is where advanced process control systems like Kanban become transformative.
A Kanban system is a “pull” methodology. Instead of “pushing” completed orders towards dispatch and creating a pile-up, the dispatch station “pulls” an order from the packing station only when it has the capacity to process it. This is managed through visual signals (like digital screens or lights) that indicate the status of each stage. By creating small, defined buffer zones between each step, you prevent any single area from becoming overwhelmed and bringing the entire system to a halt. It ensures a balanced and predictable throughput, smoothing out the peaks and troughs that cause bottlenecks.
In the context of a modern UK warehouse, this can be further enhanced with technology. For example, some facilities now use digital twin simulations to test layout and flow changes virtually before committing to physical alterations. This allows managers to identify potential bottlenecks in a simulated environment, optimising the flow of a new vertical storage system or Kanban implementation without disrupting a single real-world operation. By combining process discipline like Kanban with modern planning tools, you can engineer a dispatch system that is not just fast, but consistently and reliably fast.
Your goal is to transform your warehouse from a series of disjointed steps into a single, synchronised and highly efficient logistics machine. Start by mapping your current flow, identify the friction points, and begin implementing pull signals to create the smooth, predictable output your business deserves.